

The Progress Chef 360 platform integrates with numerous tools that you already use. If you’ve spent time building Ansible playbooks, you don’t need to discard them. The Chef Ansible Interpreter allows you to run them within Chef workflows, with no rewrites necessary.
With the Ansible Interpreter with the Chef platform, you don’t need to juggle multiple tools or duplicate effort. It consolidates your automation under one platform, helping reduce complexity, lower costs and strengthen governance—all while scaling consistently across environments.
The interpreter also verifies if the right runtime is used on each node—Python by default, but configurable for other environments when needed. This flexibility helps avoid execution errors and supports reliable automation across diverse systems.
You can also set interpreter options at the policy level for better control and consistency across complex environments. To learn more about how interpreters work, check the Ansible Interpreter Documentation
Getting Started on Ansible Interpreter
- Navigate to
https://<CHEF_360_FQDN>:31000/app/hub. - Log in with your username and password.
- Choose your organization and role on the welcome page, then select ‘Proceed’.
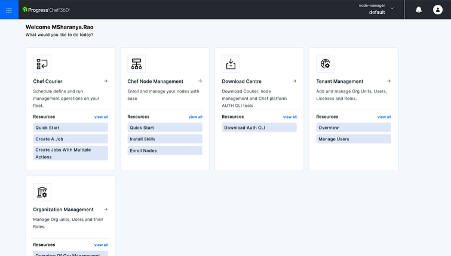
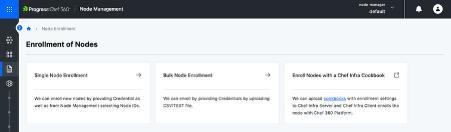
Node Management:
Node Management enables you to enroll nodes, display them in the fleet, manage the skills installed on them and organize nodes with filters and lists.
- Step 1: Under Node Management, select the 'Skill Assembly’ option.
A Skill Assembly in the Progress Chef platform is a collection of skills (like interpreters or runners) that define what nodes can do. It maintains consistent execution environments, making it easier to manage and scale automation. To learn more about skill assembly, click here.
- Step 2: Create a new Skill Assembly, name it (e.g., Ansible Interpreter), add the needed skills and save.
To confirm you’re using the right versions, always refer to the Chef 360 release notes for your version. This helps prevent mismatches and keeps your automation reliable.

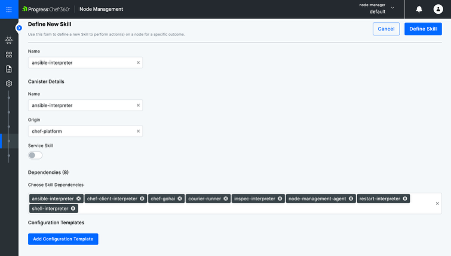
- Step 3: Go to Skill Definition, create a new skill, provide a name, add canister details and dependencies, then save.
In the Chef 360 UI, a Skill Definition outlines a skill’s function and setup, guiding nodes and supporting Skill Assemblies. You can learn more about skill definition on its landing page.
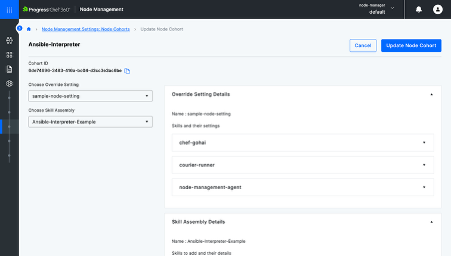
- Step 4: In Settings select Node Cohort, create a new node cohort, provide a name, set the override and link it to your Skill Assembly (e.g., Ansible Interpreter).
A Node Cohort is a group of nodes with similar roles, enabling consistent skill application and simplifying large-scale automation. To know more about the node cohort click here.
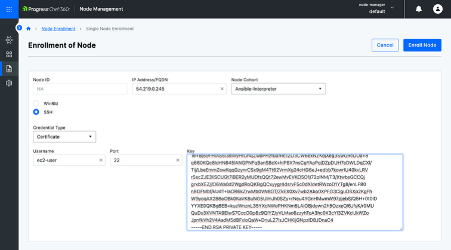
- Step 5: Go back to the All-Nodes view. Go to Enroll Node → Single Node Enrollment, enter the machine details (OS, public IP, cohort), then set up SSH access by selecting the credential type, username, and private key. Finally, click Enroll to add the node.
Note: In this blog, we’re using the example of enrolling a Linux node from the server.
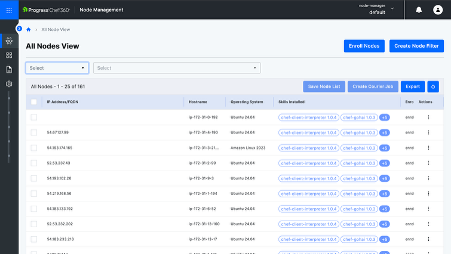
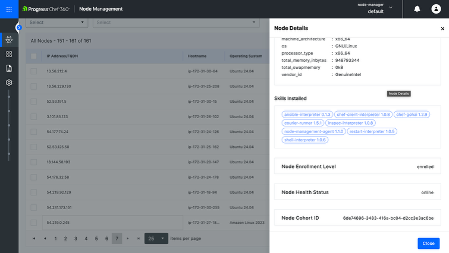
- Step 6: Go back to ‘All Nodes’ view and you will see that your node has been enrolled with all installed skills.
Tip: Chef 360 also allows you to enroll Windows, Ubuntu and RedHat nodes. It supports bulk and multi-node enrollment methods. For detailed instructions on these options, refer to the Chef 360 Node Enrollment Documentation.
You have successfully set up the Ansible Interpreter within the Chef 360 platform by completing these steps.
Now that the Ansible Interpreter is set up, let’s create a job to run your Ansible playbook in Chef 360. Here’s how:
Courier
Chef Courier enables you to run automation jobs, orchestrate tasks across nodes and reuse existing scripts or playbooks within Chef workflows.
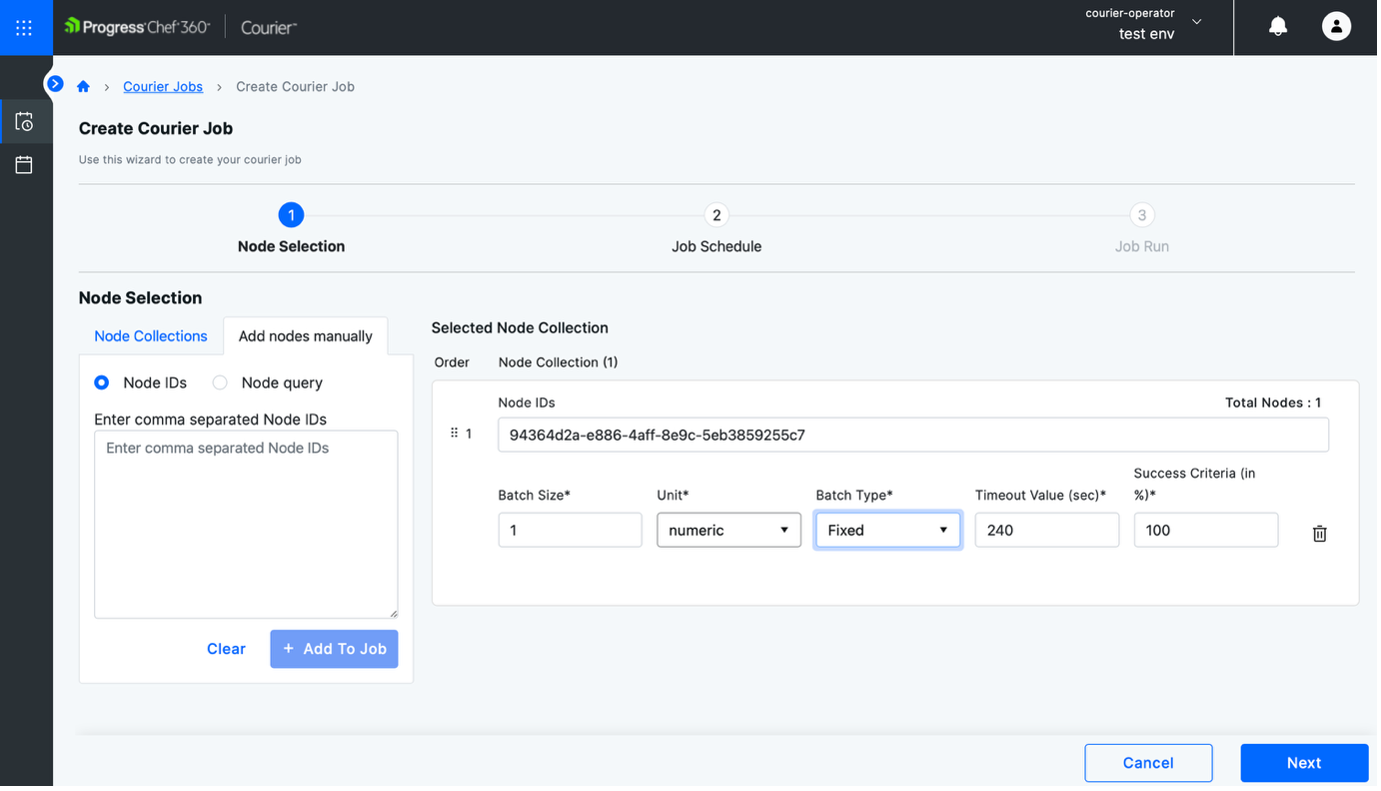
- Step 1: Select the Create Custom Job option to create a job.

- Step 2: Select Add Nodes Manually, enter the Node ID and configure batch size, unit, type, timeout and success criteria
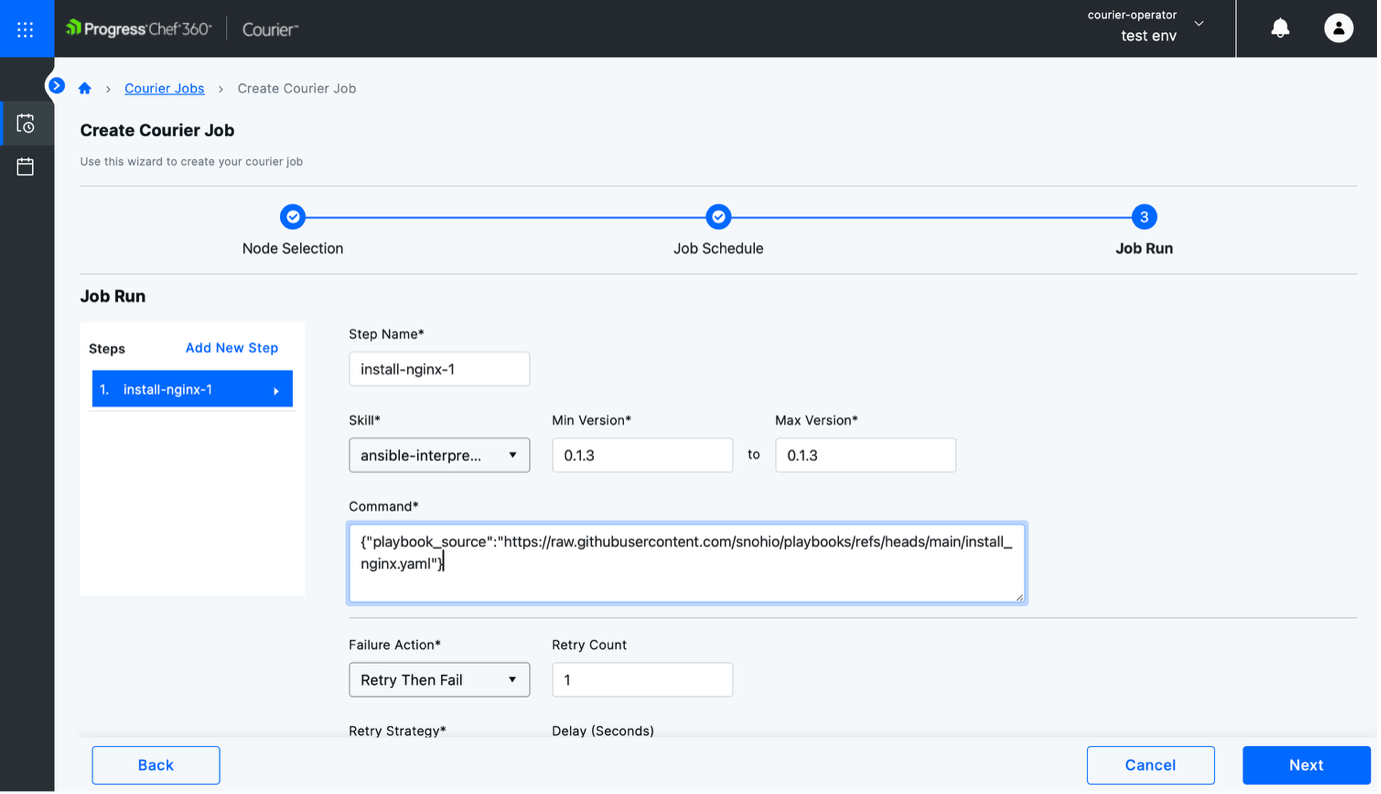
- Step 3: Add a step name, choose the skill, set minimum and maximum versions, enter the command to run and save the job.
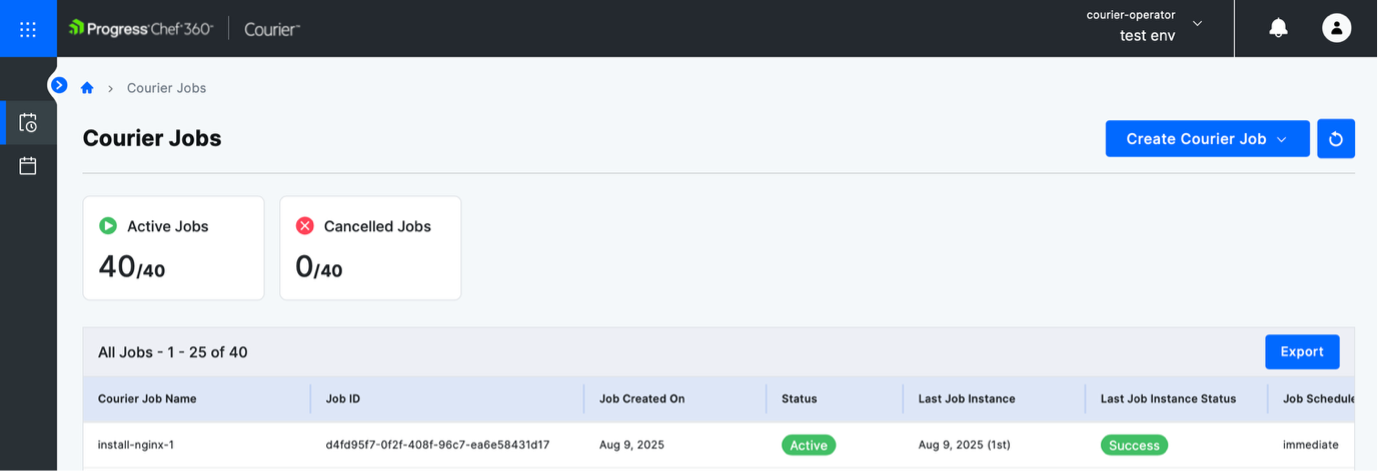
After saving the job, wait for it to run. Once it finishes, you’ll see the job marked as successful.
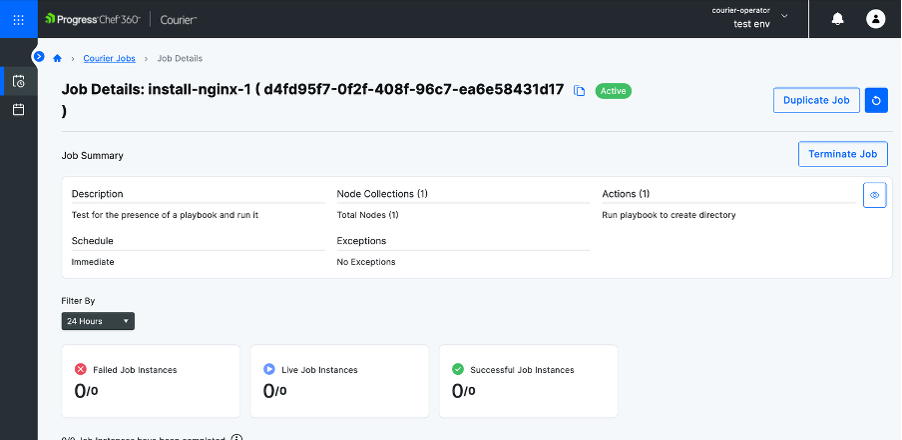
Note: Click on eye icon to view the job summary
The Ansible Interpreter isn’t just a technical feature—it’s a way to maximize your existing Ansible investment while unifying Chef automation capabilities. By reducing tool fragmentation, lowering costs and improving governance, it makes your automation strategy future-ready and business-smart.
Explore how you can take your automation further with the Chef Courier solution.
To experience the Chef 360 platform, request a trial today!